
FULL Al process for E-Commerce Website design with Lovable
How to Build a Professional E-Commerce Website on Lovable: A Step-by-Step Tutorial

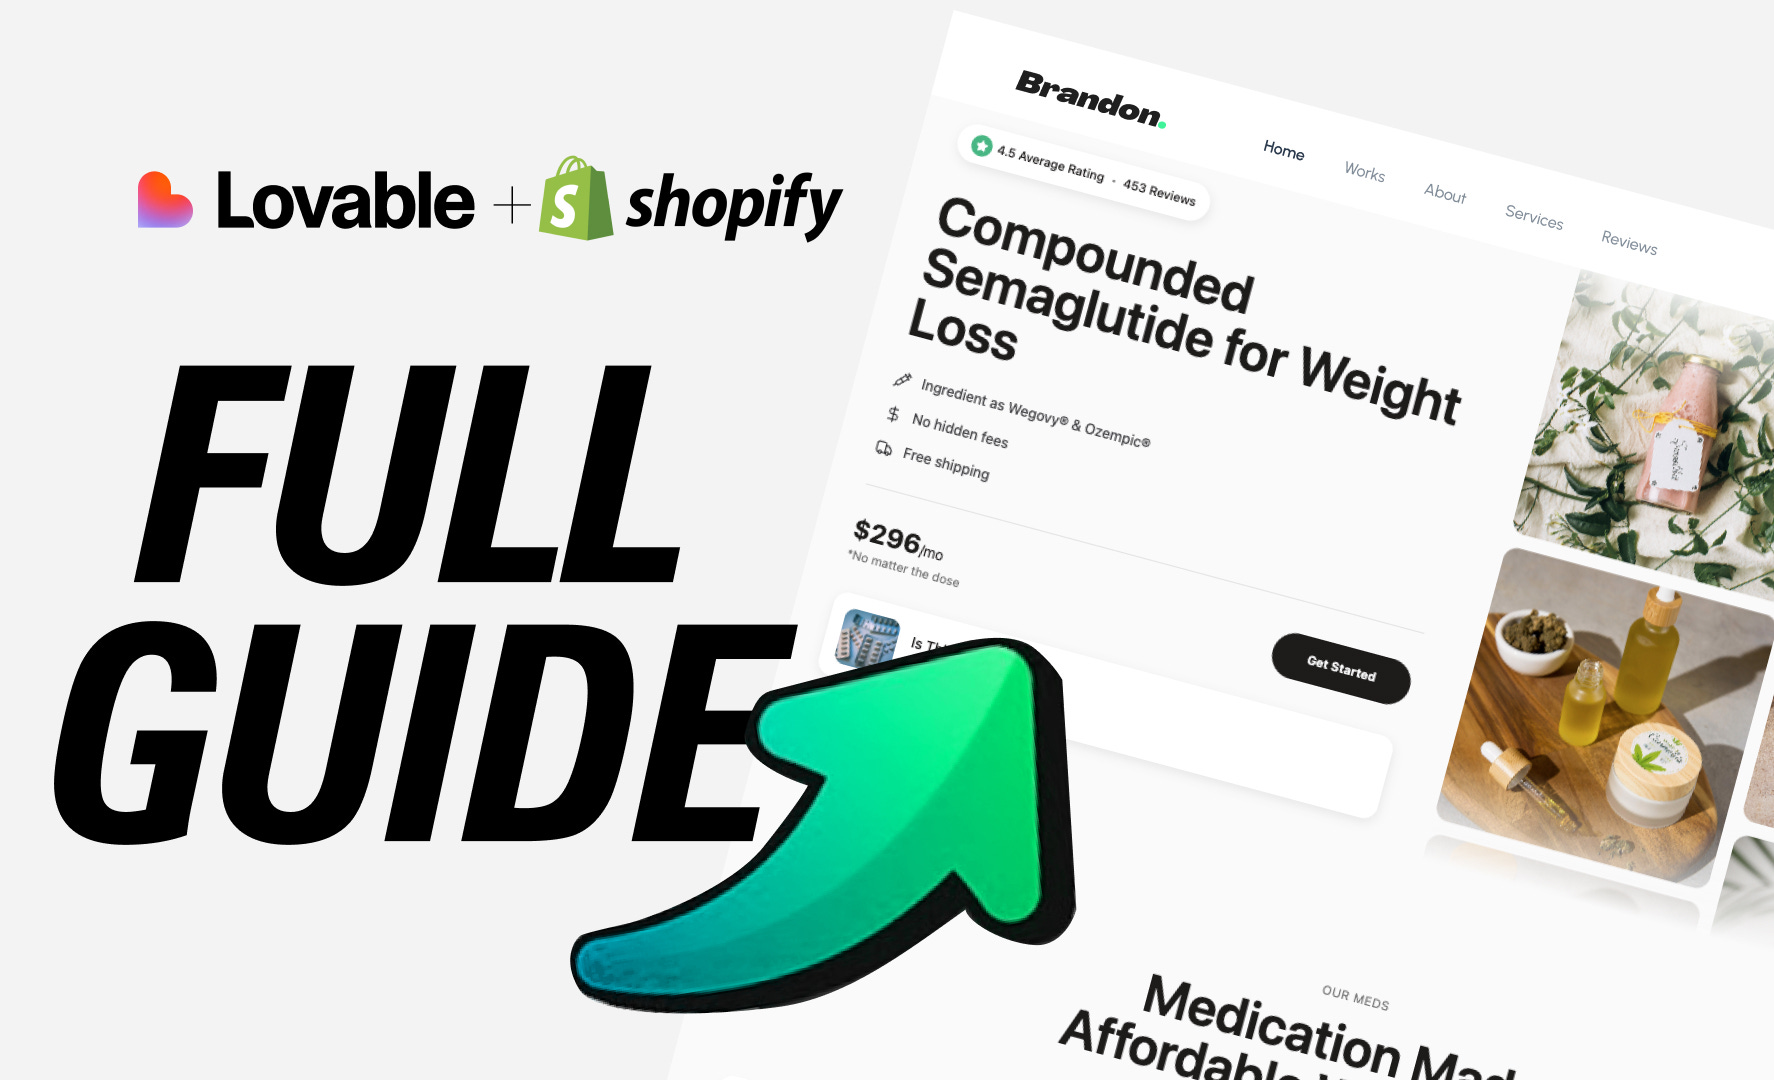
Here is E-commerce System for Lovable, Remix here
In this tutorial, you’ll learn how to build a fully-functional e-commerce website using Lovable. By the end, you’ll have:
✅ A responsive, modern landing page with hero section
✅ Real Shopify integration with live product management
✅ Dynamic product listings and detail pages
✅ Shopping cart with checkout functionality
✅ Multiple content sections (product carousel, guides, FAQ)
✅ Mobile-first responsive design
✅ Professional UI components
Live Example: A complete e-commerce storefront ready to sell your products online.
Prerequisites
Before starting, you should have:
A Lovable account (free tier works fine)
Basic understanding of what you want to sell
Product images ready (optional, can be added later)
10-15 minutes of time
No coding experience required! This tutorial uses Lovable’s AI-powered development.
Phase 1: Project Setup & Knowledge Configuration
Step 1: Start Your Project
Create a new Lovable project and immediately set up your project context. This is the most critical step that determines how clean your code will be.
The Winning Prompt Pattern:
textRole: You are an expert world-class web designer and developer, you have to follow the components approach and best programming practices while designing this e-commerce website.
We will code step by step, follow the instruction I give you to develop the UI for this website.
Important instructions:
- The website must be in light mode.
- I’ll give you the bad code, you have to convert into clean, scalable, reusable code as much as possible, using the accurate tailwind classes
- I’ll give you the images for the exact output, it should look like that
- Create the reusable component where possible, like buttons, cards, and use them throughout
- Create the global tailwind css styles wherever required, so that class will be used, and not styling in every single section, use appropriate tailwind classes
- Each section should have its own component, do not clutter all code in single file
- Make sure that each section is mobile responsive
💡 Pro Tip: Add this to Project Settings → Manage Knowledge. This ensures every AI interaction follows these rules, resulting in cleaner, more maintainable code.
Phase 2: Building the Foundation
Step 2: Create the Hero Section
Start with the hero section - it sets the tone for your entire site.
Prompt:
textCreate a hero section for an e-commerce website with:
- Rating badge (4.5 stars, 453 reviews)
- Main heading with your product name
- Three feature items with icons (customize to your needs)
- Pricing card showing your price point
- Info card with call-to-action
- Image marquee on the right with two columns of scrolling product images
- Mobile responsive layout
Key Learning: Break down your hero section into smaller, reusable components. Lovable will create:
RatingBadge.tsxFeatureItem.tsxPricingCard.tsxInfoCard.tsxImageMarquee.tsx
This component-based approach makes future changes effortless.
Step 3: Enable Shopify Integration
Critical Prompt:
textEnable Shopify integration for this project. I want to sell real products.
Lovable will:
Connect to Shopify’s Storefront API
Set up proper API configuration (2025-07 API version)
Create a development store for you
Configure TypeScript interfaces for products
Important: Lovable creates a free development store - no credit card needed for development. You only need a paid Shopify plan when you’re ready to sell.
Step 4: Build the Products Section
Prompt:
textCreate a products section that:
- Displays a category label
- Has heading describing your products
- Fetches real products from Shopify API
- Shows products in a 3-column grid (responsive)
- Each product card shows: image, title, price
- “Get Started” or “Shop Now” button that links to product detail page
- Loading state with spinner
- Empty state if no products exist
What Happens Behind the Scenes:
Lovable creates
ShopifyProductCard.tsxcomponentSets up React Query for data fetching
Implements proper TypeScript typing
Adds error handling and loading states
Phase 3: Adding Content Sections
Step 5: Create Additional Sections
For each section, use this iterative prompt pattern:
Benefits Section:
textAdd a benefits section with:
- Main heading describing your value proposition
- List of benefits with checkmarks
- Call-to-action button
- Hero image on the right
- Two-column layout (responsive)
Product Carousel Section:
textCreate a product carousel section with:
- Manual product cards (not Shopify)
- Auto-playing carousel with navigation arrows
- Cards showing product image, title, price, action button
- Mobile responsive
Features Section:
textAdd a features section with:
- Feature badges highlighting key attributes
- Grid layout of badges
- Centered heading
💡 Pro Tip: Build one section at a time. Test it, then move to the next. This prevents overwhelming the AI and gives you cleaner results.
Phase 4: Product Detail Pages & Cart
Step 6: Implement Product Detail Pages
Prompt:
textCreate a product detail page at route /product/[handle] that:
- Fetches product by handle from Shopify
- Shows product images in a grid
- Displays title, price, description
- Has “Buy Now” and secondary action button
- Shows product details in accordions (Details, Specifications, Shipping)
- Adds product to cart when clicking Buy Now
- Mobile responsive
Key Implementation: Lovable will set up:
Dynamic routing with
react-router-domZustand store for cart management
Shopify Storefront API integration
Proper checkout flow
Step 7: Shopping Cart & Checkout
Lovable automatically implements the cart system following Shopify best practices:
✅ Cart Store with Zustand (persistent across sessions)
✅ Storefront API checkout (never manual URLs)
✅ Cart drawer component with add/remove items
✅ Proper overflow handling for mobile
No additional prompt needed - this is built-in with Shopify integration!
Phase 5: Responsive Design Refinements
Step 8: Mobile Optimization
As you build, you’ll notice some responsive issues. Here are the exact prompts used to fix them:
Fix Overflowing Carousel:
textFix this in mobile version, make it responsive, should not overflow
Adjust Spacing:
textAdd spacing above the badge for the tablet and mobile version, but not on the laptop version, it’s too much with the navbar
Standardize Typography:
textMake sure this heading size is same as other sections in all screen sizes
Then:
textDo so for all sections, all to have the same sizing as the hero section heading
🎯 The Pattern: Be specific about what’s wrong, reference specific elements, and Lovable will fix it surgically.
Phase 6: Final Polish
Step 9: Add Supporting Sections
Content Guide Section:
textCreate a content guide section with:
- Heading describing your content offering
- Feature badges with statistics or highlights
- Grid of guide cards with images
- Each card links to relevant content
FAQ Section:
textAdd an FAQ accordion section with common questions about:
- How ordering works
- Shipping information
- Pricing details
- Returns and refunds
Footer:
textCreate a footer with:
- Logo and tagline
- Navigation links (Shop, About, Contact)
- Social media icons
- Copyright notice
- Mobile responsive layout
Key Learnings & Best Practices
✅ DO’s:
Set up project knowledge first - This is your blueprint for clean code
Build incrementally - One section at a time
Be specific with prompts - Include exact text, layout description, behavior
Use component-based thinking - Request reusable components
Test on mobile frequently - Responsive issues are easier to fix early
Request proper TypeScript typing - Lovable handles this automatically
Use real Shopify integration - Never mock products
❌ DON’Ts:
Don’t request everything at once - Break it into phases
Don’t use vague prompts - “Make it nice” won’t get you far
Don’t skip the knowledge setup - You’ll pay for it later with messy code
Don’t manually write code - Let Lovable handle it through prompts
Don’t forget mobile testing - Most users are on mobile
Advanced Tips
Interesting Prompt Techniques:
1. The “Convert Bad Code” Pattern:
When you have existing code that needs refactoring:
textI have this code [paste code]. Convert it into clean, scalable, reusable components following best practices.
2. The “Make it Like” Pattern:
Reference existing sections:
textCreate a section similar to the hero section, but for [new content]
3. The “Fix Without Breaking” Pattern:
textFix [specific issue] but don’t change [other elements]
4. The Consistency Pattern:
textMake sure all [elements] have the same [property] across all sections
What You’ve Built
After following this tutorial, you have:
✅ Professional e-commerce storefront with 7+ sections
✅ Real Shopify integration with working cart and checkout
✅ Mobile-responsive design that works on all devices
✅ Reusable component library for future updates
✅ TypeScript-powered with proper typing
✅ Production-ready code structure
Time Invested: ~2-3 hours of iterative prompting
Code Quality: Production-grade, maintainable, scalable
Cost: Free during development phase
Next Steps
To go live:
Create actual Shopify products through Lovable
Claim your Shopify store (starts 30-day free trial)
Deploy your site using Lovable’s publish button
Connect a custom domain (requires paid Lovable plan)
After 30 days, activate Shopify paid plan to start selling
Conclusion
Building an e-commerce website on Lovable is fundamentally different from traditional development. Instead of writing code, you’re architecting through conversation. The key is:
Clear instructions upfront (project knowledge)
Incremental building (one section at a time)
Specific prompts (exact requirements)
Iterative refinement (test and adjust)
The result? A professional e-commerce site in hours, not weeks, with production-quality code you can actually maintain.
Happy building! 🚀
Future Enhancements:
Add Blog Section
Add Product Comparison
Add Testimonials Section
Add Newsletter Popup
Hi Viktor, the remix link is set to private on this post and also for your premium users, so I cannot use it. Could you please fix this please.
Thanks